The strategies in this playlist represent different activities and strategies that you can add into your existing daily routine and procedures. Each strategy is designed to provide students with an opportunity to generate ideas, focus on fine details, and enhance creativity.
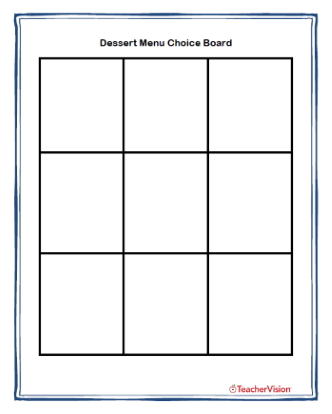
Strategy Name: “Dessert” Menu |
|
| A choice board that enhances creativity. | |
|
|
What Is It?A Dessert Menu is essentially a choice board and a way to enrich creativity in early finishers across all subject areas. Students are able to choose an activity from a selection that is fully customized by you based on your students’ needs and the subject area that you teach. Activities should be designed that elaborate, enhance, and entice creativity. Why Is It Important?Students may be more creative and productive when they have a choice in the matter. Oftentimes, we dictate so specifically what students need to work on and create that we forget to give them some space, freedom, and flexibility in regard to their ideas. How Can You Make It Happen?You can model idea generation through a think-aloud process. Choose a selection from the menu and explain your creative process as you complete the task you chose. Encourage student input and help as you work out loud. When Can You Use It?You can implement a dessert menu initially after students finish a test. As students finish at different rates, they will be kept engaged and will be able to select an activity or project to complete from the menu. The menu can be extension choices of the subject they’ve just tested on. You can also use a dessert menu during center time, as morning or bell work, and for early assignment finishers. How Can You Manage It?Completed dessert menus can be collected and placed in a portfolio for each student. A collection of work can help show student progress over time. It is also a great talking piece at conferences and is something you can use as evidence if referring a student for a gifted screening or evaluation. How Can You Stretch Students’ Thinking?Encourage students who complete an item from the dessert menu to either complete an additional activity or to design their own! How Can You Modify And Support Students?Students who have special needs will love getting in on the action! Oftentimes, students can feel overwhelmed with many choices, so limit their options to three. You can even design a menu specifically for them individually, based on their likes and interests in order for them to be successful. |
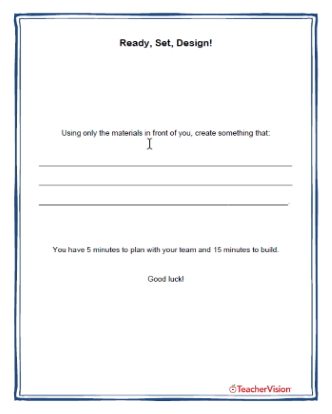
Strategy Name: Ready, Set, Design |
|
| A strategy to improve creativity and innovation on the spot! | |
|
|
What Is It?Ready, Set, Design is a strategy that requires teamwork, innovation, creativity, and a few materials that you have around your home or classroom. It’s a strategy that is most appropriate during science classes, but can essentially be used as a warm up to the day, for team building lessons, for a Fun Friday activity, or even in other subject areas when students are going to be asked to write stories to get creative juices flowing. Why Is It Important?Students not only learn how to cooperate and collaborate, they learn to think on the fly. They get exposed to others’ ideas and thinking processes. Students also learn the value of pre-planning before building, and how they can take their ideas on paper and turn them into a reality in front of them. How Can You Make It Happen?Place students into groups of 3 or 4. Provide them with a box of props. Props can include paper towel rolls, string, wrapping paper scraps, empty water bottles, cords, pipe cleaners, or anything that you are going to throw out. Give each team 5 minutes to examine the props and make a design plan in order to come up with a new invention. When Can You Use It?This strategy is wonderful when you notice students need to improve teamwork, idea sharing, and when they need help with showcasing innovation. This activity can be inspiring and as a result, produce a great writing piece, allow students to put more effort in on a test, and can encourage thinking outside of the box in classes like science and math. How Can You Manage It?You can keep a supply of stuff that you’re able to rotate in and out of this innovative center. Be sure to ask parents to send in donations (but not too many at once-you don’t want your classroom to turn into a junk heap!). Because creativity is key, students should be given design parameters to follow such as a limited number of materials to use and a set time limit to abide by! How Can You Stretch Students’ Thinking?Consider assigning a theme with each Ready, Set, Design activity. If using this strategy around a holiday, make it holiday themed (can you design a Leprechaun trap with only the materials in front of you?). You can center it around the seasons, subject areas, or as an extension of any topic you are learning about across the subject disciplines. How Can You Modify And Support Students?A great way to build creativity and broaden students’ backgrounds is to put students into leveled pairs. Often times, students who are naturally able to create “rub” off on those who need a little more inspiration! Basically peer tutoring, these students learn how to put both of their very different ideas together to make something amazing! |
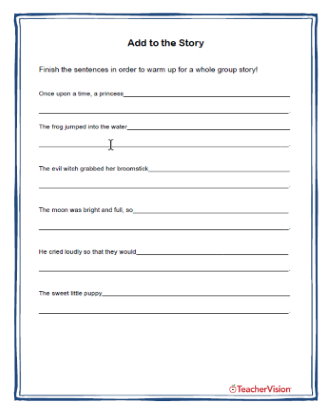
Strategy Name: Add to the Story |
|
| An on-the-fly activity to help students create by listening and extending thoughts. | |
|
|
What Is It?Add to the Story is a strategy that helps students think creatively on their feet. A student begins telling a story. When they hear a bell ring (or a horn beep), they have to point at another student to complete their thought, or move on. Students make creative choices about characters, plot, and even realize when it’s time to bring it to an end. Why Is It Important?This strategy doesn’t just enhance active listening skills, but it encourages creativity and may put them in the mood to write, design, and make with their hands across all subject areas. It’s wonderful to warm up to any kind of STEM activity and it also enhances their on the spot reponses! How Can You Make It Happen?Modeling is key! Put students in a circle. Begin by starting a story (“Once upon a time”) and pointing to another student to finish your sentence. For example, you can say, “Once upon a time, there was a princess who loved to.” The student you select must finish your thought and begin another one that flows into a story. Practice and patience is extremely important. Once students get the hang of it, they’ll be begging you to create a tale on a regular basis! When Can You Use It?You can use this creative activity as a time filler across all subject areas. You may wish to incorporate it before completing a STEM task or writing a story in ELA class. It also makes for a fun pick me up or break when students are sending you cues that they need to get out of their seat and off of a worksheet for awhile! How Can You Manage It?You can be the bell ringer at appropriate times in the story, helping students to recognize when it’s time to shift thoughts, change up a character, elaborate on a plot twist, or bring it to an end. You can even choose to videotape a session once students get good at this create strategy in order to create a cool collection that the class will love to watch at the end of the school year. This is great for showing growth over time. How Can You Stretch Students’ Thinking?You can tell students that their story has to stick to a theme or they can only say 5 words at a time to make it more challenging! You may also want to incorporate key vocabulary throughout the story. For example, if your word of the day is ferocious, students should try to use it at least three times. Vocabulary use could work across the curriculum! How Can You Modify And Support Students?Because some students may not be able to think on the spot (initially), be ready to prompt them or assist them with giving them a transition word or an idea to keep the story moving. You can also have the entire class complete an Add to the Story worksheet as a warm up before working as a whole group. Phrases can be kept short, simple, and sweet. |
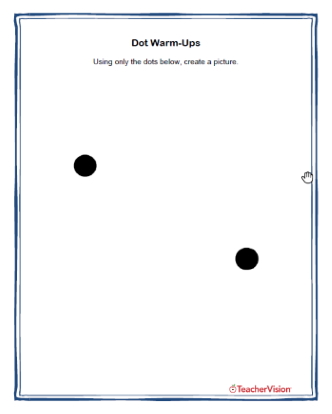
Strategy Name: Dot Warm-Ups |
|
| A simple art strategy to inspire and develop the ability to create in an instant. | |
|
|
What Is It?Dot Warm-Ups is a strategy in which you provide students with a series of dots that they must turn into an image. Why Is It Important?Creativity doesn’t come easily or naturally to everyone, but it can be taught through practice, modeling, and implementing a wide range of strategies. How Can You Make It Happen?You can make dots on a sheet of paper, copy it, and distribute one to each student. Set a timer and allow their creative juices to flow by asking them to turn the ordinary dots into something extraordinary. When Can You Use It?Dot Warm-Ups are most effective at the beginning of a lesson that requires students to dig deep and get creative, but it can also be used as a time filler or as an art break. How Can You Manage It?After time’s up, collect each sheet and quickly hold either your favorite up, the one you feel is most creative, or you may choose to show everyone’s design in order for students to understand that not everyone thinks the same. How Can You Stretch Students’ Thinking?You can assign specific requirements with each Dot Picture. For example, you can ask students to their their dots into an animal, or a person. You can directly relate it to a subject you’re studying. For example, if you are teaching about plants, students can turn the dots into a plant they can find in your local habitat. How Can You Modify And Support Students?You can help students who may struggle with this by using your Smart Board in order to project the dots initially. You can model how your mind pictures them and turns them into a picture or object, or you can invite several students to the front of the class to draw and talk through their creative process in order to inspire students who may need more support. |